Views are one of ClickUp's most powerful features. BUT, they can also be one of the most overwhelming features for most ClickUp users - both new and experienced. There is a lot to know about ClickUp views and how they work. If you're looking to achieve clarity and visibility in your workspace, mastering views is a crucial step to take.
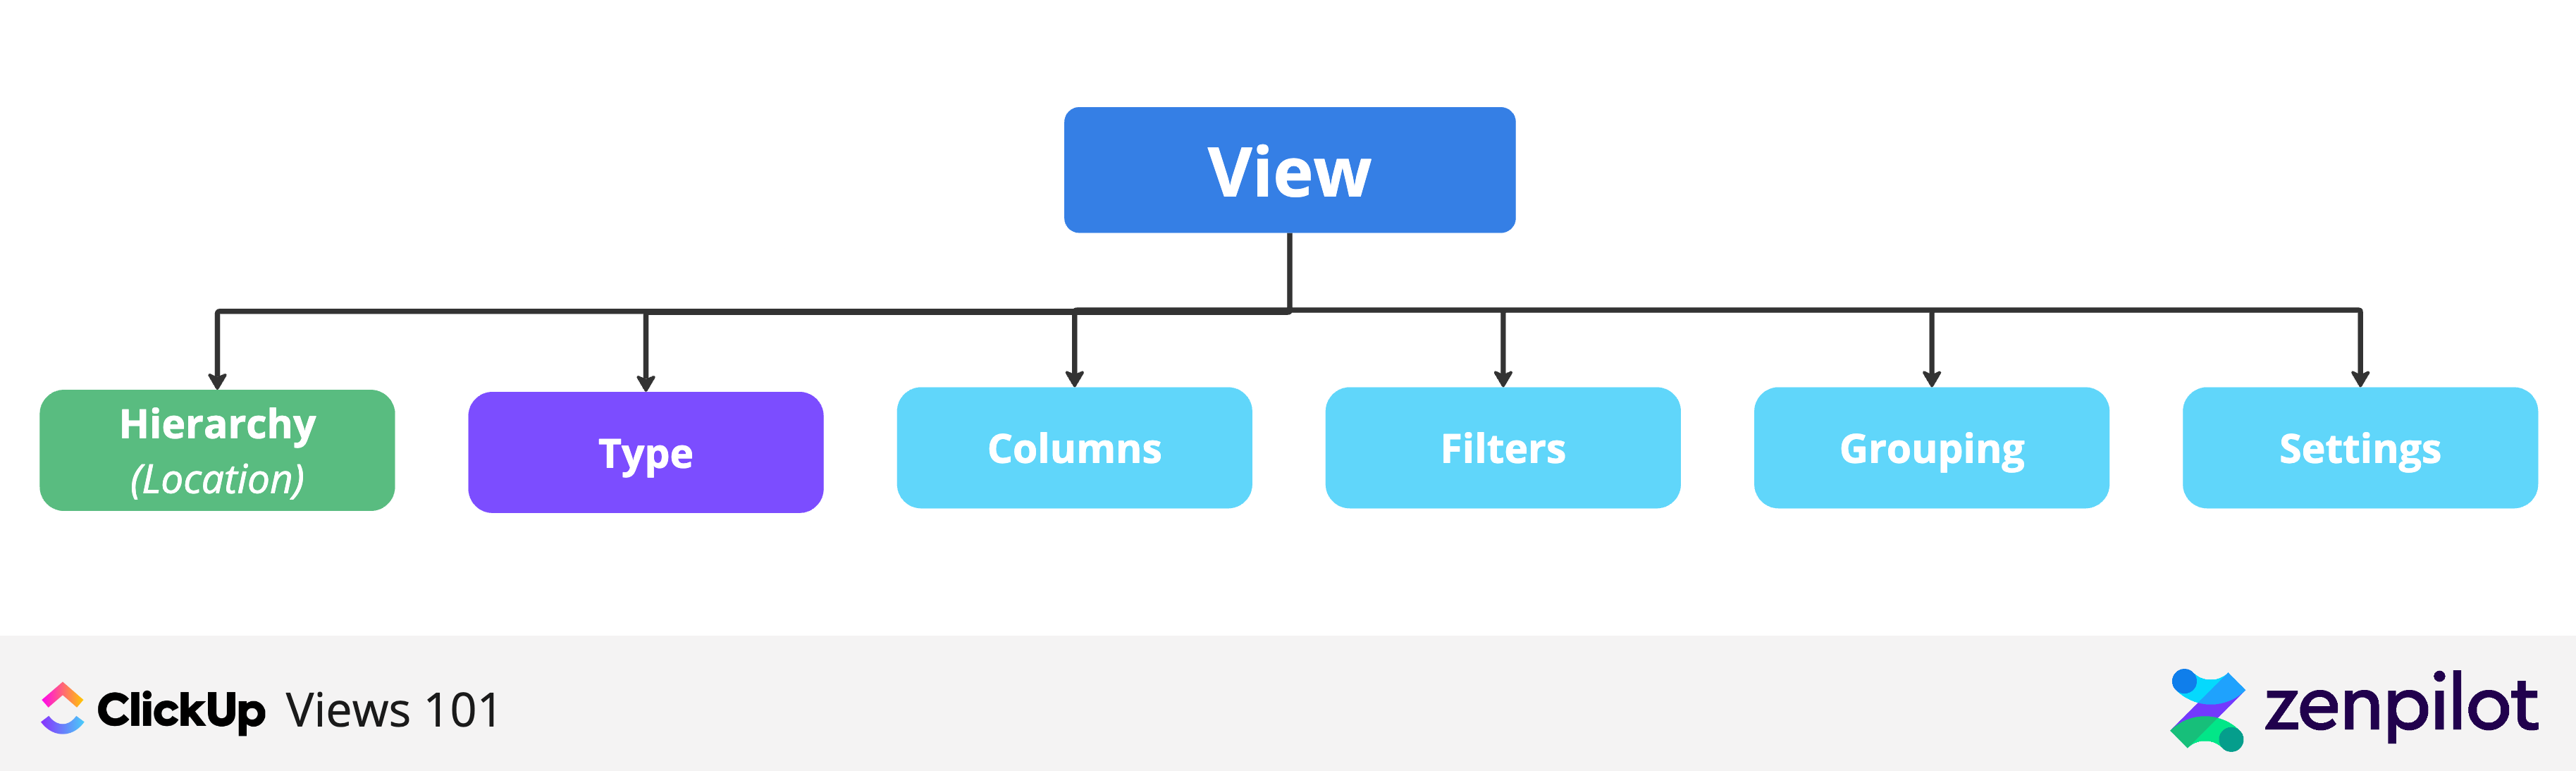
This guide unpacks all the basics of ClickUp views, including the importance of the hierarchy, different types of views, columns, filters, grouping tasks, and view settings.
Unpacking the Basics of ClickUp Views
In ClickUp, there are six components that you need to fully understand before creating views in your workspace. And, at the heart of this, is understanding ClickUp's Hierarchy.
1. Understanding ClickUp's Hierarchy
Before diving into the core topic of views, it is essential to understand the hierarchical structure of ClickUp. I suggest you read this article, "The Best ClickUp Hierarchy for Agencies", first.
This structure serves as the backbone upon which ClickUp functions. It reflects your organization, the tasks, the projects, and the teamwork that goes into keeping things running smoothly.

Why is ClickUp's Hierarchy Important for Views?
-
Views can be built at ANY level in your ClickUp hierarchy.
-
Views will show ALL tasks below that level of the hierarchy that the view is built on (i.e. a Space level view will show you all tasks in the folders and lists that fall within that space).
Therefore, If you want your views to show you meaningful information, you need your hierarchy to be built correctly. (i.e. if you want to see work across all of your active clients, you need to have a space dedicated to client work).

2. Different Types of Views in ClickUp
In addition to incorporating ClickUp's views into your hierarchy, it's also important to know the different types of ClickUp views.
-
List View: The most straightforward view, it presents tasks in a simple list format. You can easily add, remove, or reorder tasks in this view. This is the default view when you create a new space, folder, or list.
-
Here is a view that we recommend creating right out of the gate.
-
-
Board View: Ideal for those who prefer a more visual representation of tasks, it presents tasks as cards moving across different columns (typically representing various task statuses).
-
Calendar View: Offers a temporal representation of tasks, showing when each task starts, ends, and is due. It's perfect for tracking deadlines and creating content calendars.
-
Gantt View: Allows you to visualize tasks and dependencies over time. It's excellent for project management, helping you keep track of how individual tasks tie into the overall project timeline. We use this view to reschedule work using dependencies. Check out this video here.
-
Table View: Combines the simplicity of List view with the added dimension of data fields for each task (like in a spreadsheet). It's great for those who are looking to show a variety of custom fields in one spot.
-
Map View: Visualizes tasks based on location. This can be most helpful if you build a CRM within your ClickUp workspace.
-
Activity View: Provides a live feed of all the activities related to tasks. It's perfect for real-time tracking and monitoring progress.
-
Box View: A unique view that groups tasks by assignee, giving you an instant understanding of each team member's workload.
-
Timeline View: Shows tasks on a timeline, offering a clear visual of task durations and when they overlap.
-
Workload View: Helps you visualize your team's capacity, making it easier to manage resources and avoid over or under-booking.
💡 Pro Tip - This view is tied to assignees, due dates and time estimates. If you want this to be useful, you NEED to make sure you have those three ingredients on every task in your workspace.
Each of these views serves a specific purpose and provides a different perspective on your tasks. Understanding the purpose of each view and when to use it is critical in making the most out of ClickUp.
BONUS
Download the Complete ClickUp for Agencies Guide FREE
The 47-page guide includes graphics, checklists, and links to how-to videos so you can actionize your ClickUp plan.


In addition to these task-based views, you also have the opportunity to create documents, whiteboard, forms, chats and embed views (i.e. a Google Doc, Miro Board, Spreadsheet, etc.) into ClickUp!
We could spend hours talking about every view type, but that'll be for the more advanced guide on views. Stay tuned. 😎
3. Columns Within ClickUp Views
Most views in ClickUp have different Columns shown within the view. You can add, hide, or modify columns based on the information your team needs to see.
For instance, within a column, you can display different ClickUp fields or custom fields to suit your specific requirements.
Make sure to display the essential columns when setting up a view, as this standardization will help your team understand what they will see when accessing a specific view.
You can add or hide columns based on your requirements, resize them for better readability, and even save a template in the ClickUp template center to streamline the view creation process. There's a video at the bottom of this article that walks through this process.
How to set up columns in your Views:
-
Start with the default columns provided by ClickUp.
-
Customize columns by clicking on the '+ Column' button (far right)
-
Add or hide columns as per your requirements. Be mindful of not adding too many columns as it may make your view cluttered.
-
Move them left or right to display exactly how you want them ordered.
-
Try to maintain a standardized set of columns across your team for consistency.
4. Filtering Tasks in Views
The ability to filter views are a powerful (but intimidating) feature in ClickUp. Within views you can narrow down and view tasks that meet specific parameters or conditions.
This is where a lot of the power can be unleashed in ClickUp.
Filters can be applied based on task attributes like status, due date, assignee, priority, tags, and more. You can also create custom filters based on custom fields.
If you've built your hierarchy correctly, and incorporated custom fields (more on this in our 47-page ClickUp for Agencies Guide), filters will help you create custom views for members at any level in your organization.
-
Individual contributors can filter tasks to only tasks assigned to them.
-
Account and Project managers can see all deliverables and projects associated with their clients.
-
Leadership can see all projects, their progress, and whether they are on-track or off-track.
Turn Chaos Into Clarity.
We're your agency operations pilot.
You can build a happier, more productive, more profitable team with ClickUp. We'll show you how.
Applying filters in ClickUp can be a daunting task for new users. Sometimes, they may mistakenly assume that a task has been deleted from the view when it simply does not meet the filter's criteria.
It's important to understand that filters hide tasks that don't match the selected parameters, so don't panic if a task seems to have disappeared.

5. Grouping Tasks in Views
Grouping tasks is another helpful feature that helps you bring further order and structure to your viewing tasks.
With grouping, you can group tasks together based on a common attribute. For instance, you can group tasks by status, assignee, priority, tags, or even custom fields. This makes it easier to get a quick overview of your tasks.
Grouping can also help you leverage the powers of the multi-task toolbar.😎
💡 Pro Tip - If you create a Delivery Role custom field and apply it to your task templates, you can easily assign work.
But again, this will all stem from designing your ClickUp Hierarchy the RIGHT way.
6. View Settings
Lastly, ClickUp offers an array of settings within a view. This allows you to further customize and enhance your views. Each view type will have specific settings, but here's a look at some of the basics:
-
ClickUp provides you with options to choose how subtasks are displayed - collapse all, expand all, or show them as separate tasks.
-
Protect your views to prevent team members from editing them. This can help standardize the views and keep them consistent for all team members.
-
Make the view private so that only you can see it.
-
REMEMBER, any adjustments you make to a public view will be visible to everyone else in your workspace unless you make it a private view.
-
-
Show breadcrumbs on your tasks for easy navigation
-
Task Locations. This is very helpful when you create views at your Everything or Space level.
-
Subtask Parent Names. This is very helpful when you are showing your tasks as separate tasks within a view.
-
-
Enable 'Me Mode' to filter tasks specifically assigned to you or whoever is logged in.
-
Pin views to that specific location. This makes that view show first in the view priority.
-
Default for everyone. This makes your view always show up for someone when they go to that location.
Streamline View Creation with View Templates
The beauty of ClickUp also lies within the ability to make a template out of just about anything.
After you've created a view that you like, we recommend that you save it as a template, and deploy it in different parts of your workspace. This will help with standardization and team adoption in the long run.
💡 Pro Tip - Begin by creating a basic List view template. This should be your generic Task View that will show up in every location.
Get More Out of ClickUp by Mastering Views
Mastering ClickUp views is the key to achieving clarity, visibility and getting the team to buy-in to using ClickUp.
Standardization and helping train your team on views, is crucial to helping them understand what's going on. They can be very complex, but they don't need to be.
If you have any questions about views, need help training your team or need an expert to help harness the power of ClickUp, send us a chat or book a call with us.
We've helped 2,700+ others streamline their operations in ClickUp, and we'd love for you to be our next success story.
“Since becoming our first partner in 2018, ZenPilot has stood out as the go-to solution for agencies who want to get the most out of ClickUp.
Their commitment to truly solving for the customer and providing the best customer experience is perfectly aligned with our mission at ClickUp - and it shows up in their results and the feedback we consistently hear about ZenPilot.”
 Zeb Evans
ClickUp Founder & CEO
Zeb Evans
ClickUp Founder & CEO