Why Should You Run Your L10 Meetings™ in ClickUp?
How many times has someone said they would do something in a meeting and it never ended up happening? Or maybe it did, but it took 10-20 followup messages...
The best part of running L10 Meetings™ out of ClickUp, is the ability to make your meetings much more actionable, and provide the accountability that we all need.
Running L10 Meetings™ directly in ClickUp helps you create and assign tasks that come from meetings and then check the status of those meetings weekly. Tasks won't be disappearing in this meeting structure.
Aside from that, you'll also have a much easier process for reviewing rocks, solving issues, and evaluating scorecards.
Related: How to Run EOS® in ClickUp
Running L10 Meetings™ Directly in ClickUp
Step 1: Create an Agenda Template
To begin, create your L10 Meeting™ agenda template (you can download our L10 meeting agenda template here).
This should include meeting topics you will discuss and time limits for each of them.
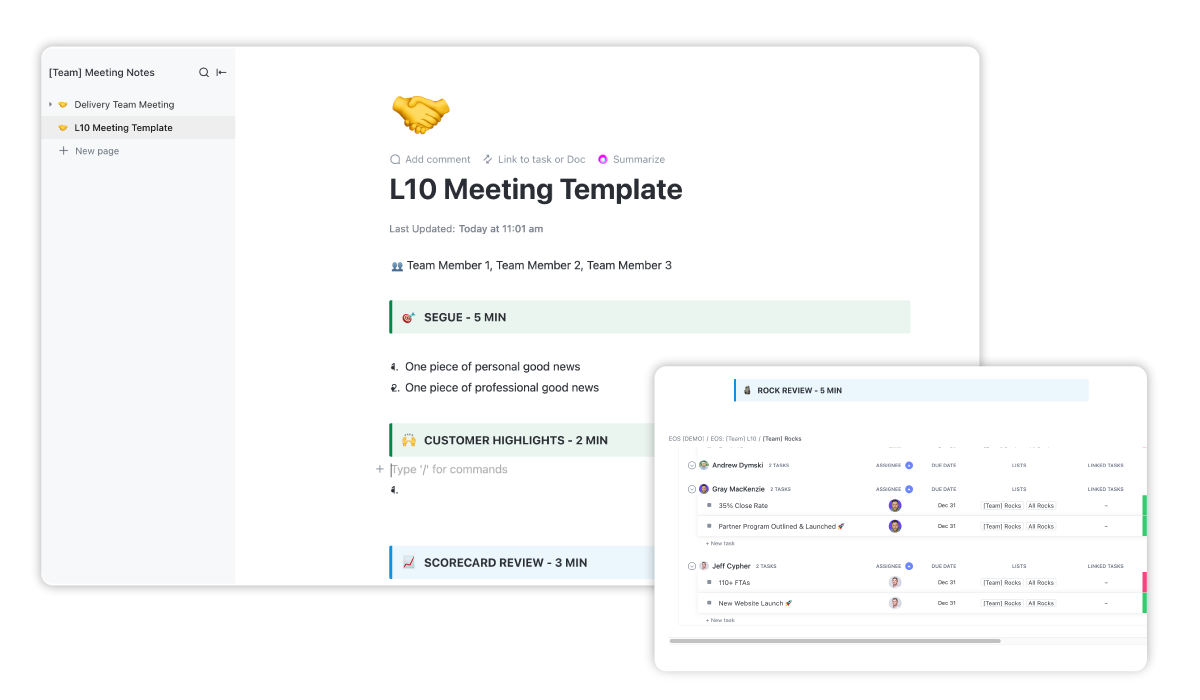
You can also embed your scorecard, rocks list, issues list, and to-do list directly into this document. Or you can just link out to those resources.
Step 2: Assign Meeting Tasks
Assign tasks related to the L10 Meeting™ to everyone that will be attending. This should include tasks related to prep, attending, and any post-meeting tasks.
These tasks will live in the L10 Meeting™ & To-Dos List.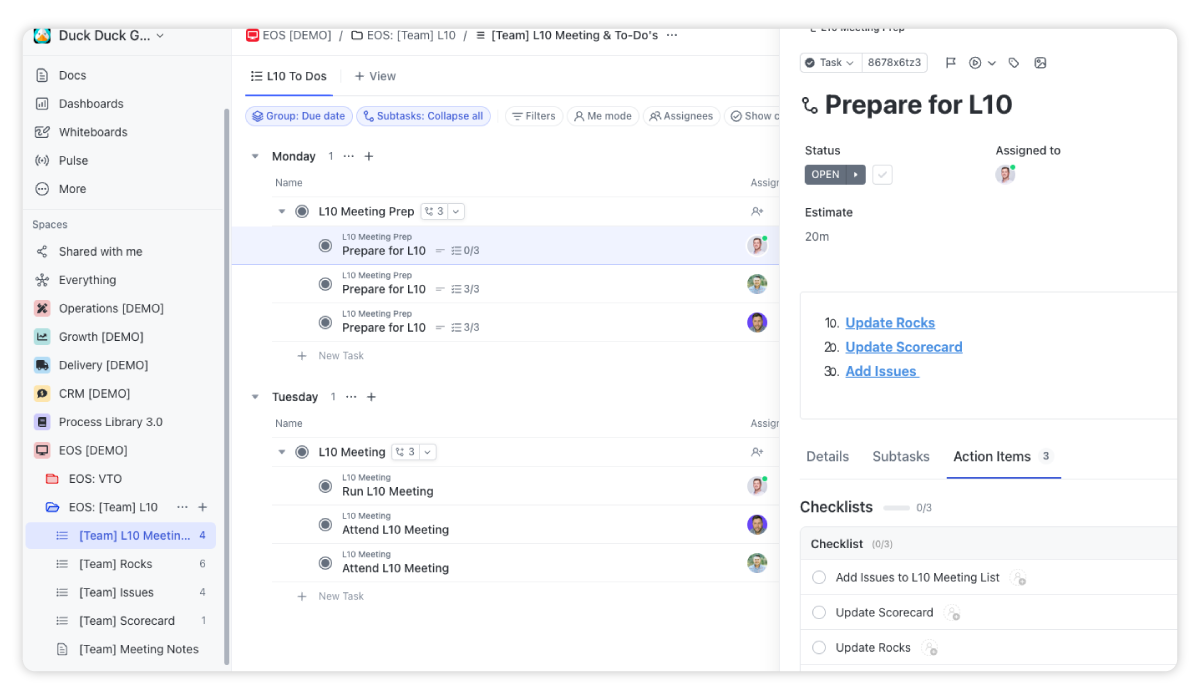
Your prep tasks should direct your team to update their rocks (marking rocks as on or off track), add issues to the issues list, and update their scorecard metrics.
Giving them a task the day before the meeting will make sure everyone is prepared and ready to go.
Step 3: Run the Meeting
Run the meeting and follow the L10 structure.
You'll always want to make sure you have someone keeping and tracking time and documenting everything. Assign those duties to two members of your team to keep the meeting running smoothly and on time.
And follow the agenda.
Meetings are often time-wasters because there is no agenda or the agenda isn't followed. Stay on time and don't be afraid to stop conversation and move on to the next meeting item if necessary.
Step 4: IDS™ (Identify, Discuss, and Solve)
When it comes to IDS™ (Identify, Discuss, and Solve) in ClickUp, you'll work out of your L10 Meeting™ Issues List.
The team should've already added issues to this list, but you can ask if anyone needs to add anything else to add.
Before you begin, prioritize three issues on the list. You can use the ClickUp priority field to do this.
Your issues list should contain a view that sorts your issues by priority so that you can group all of the urgent issues together and solve those first (shown below).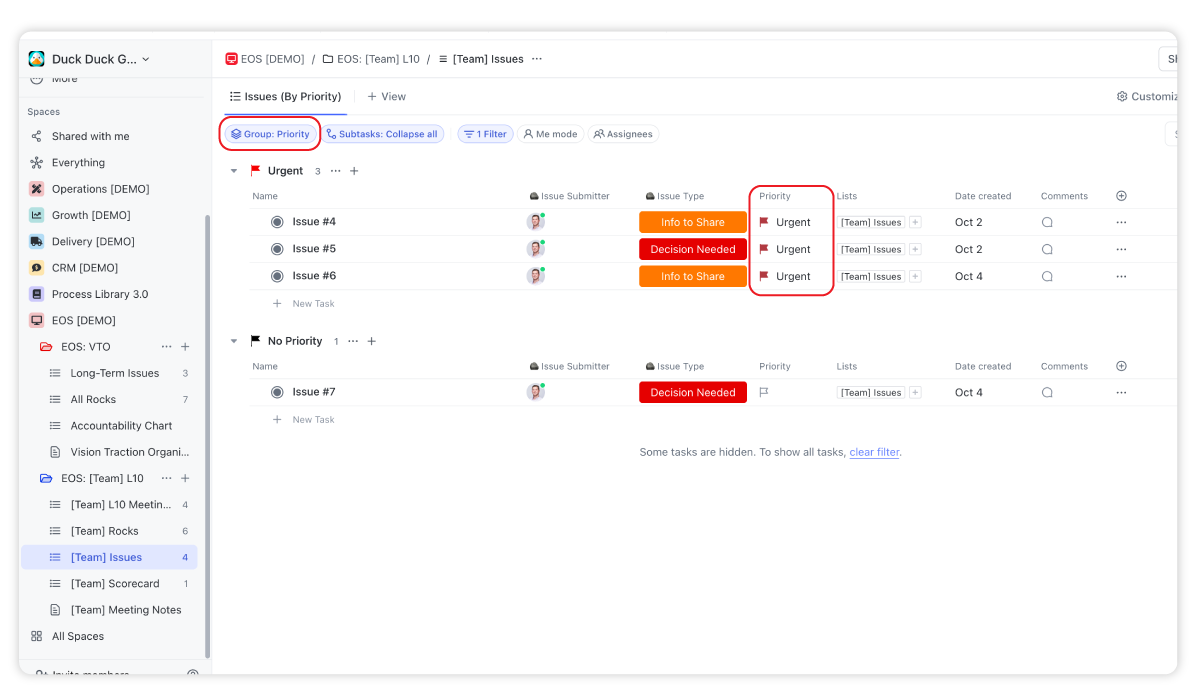
Once your team has prioritized three issues, it's time to start discussing and solving. Click on the issue to open up the task details.
Hopefully there will be a task description explaining what the issue is. But regardless if there is or isn't, you'll have the issue submitter speak and explain the issue.
Once the issue is explained, begin discussing and solving it. You can take notes directly in the task description or comments section. When the issue is solved, you can close the task.
If there is an action item from this issue, you can either turn the issue into a task and be moved to the L10 Meeting™ & To-Dos List. Or you can create a separate task from it.
I recommend that you grab all of the notes from this task and paste them to the new task, or add a relationship between the two tasks to easily relate back to the issue.
Once you've solved all three issues that you've prioritized, prioritize the next three. Keep going until you run out of time.
🎁 BONUS: ClickUp Automation to Send Low Health Score Clients to The Issues List
For teams that have built a CRM inside of ClickUp, you'll be able to address client issues before they become fires during your IDS™ time (this is actually an internal process that we've built at ZenPilot and it's been extremely helpful).
You'll begin this process by creating a deals list in your ClickUp CRM (or within your client tracker).
When your account managers update these deal records and submit their client health scores, the "task", if there is a low health score, will automatically be added to the issues list for discussion (see automation below).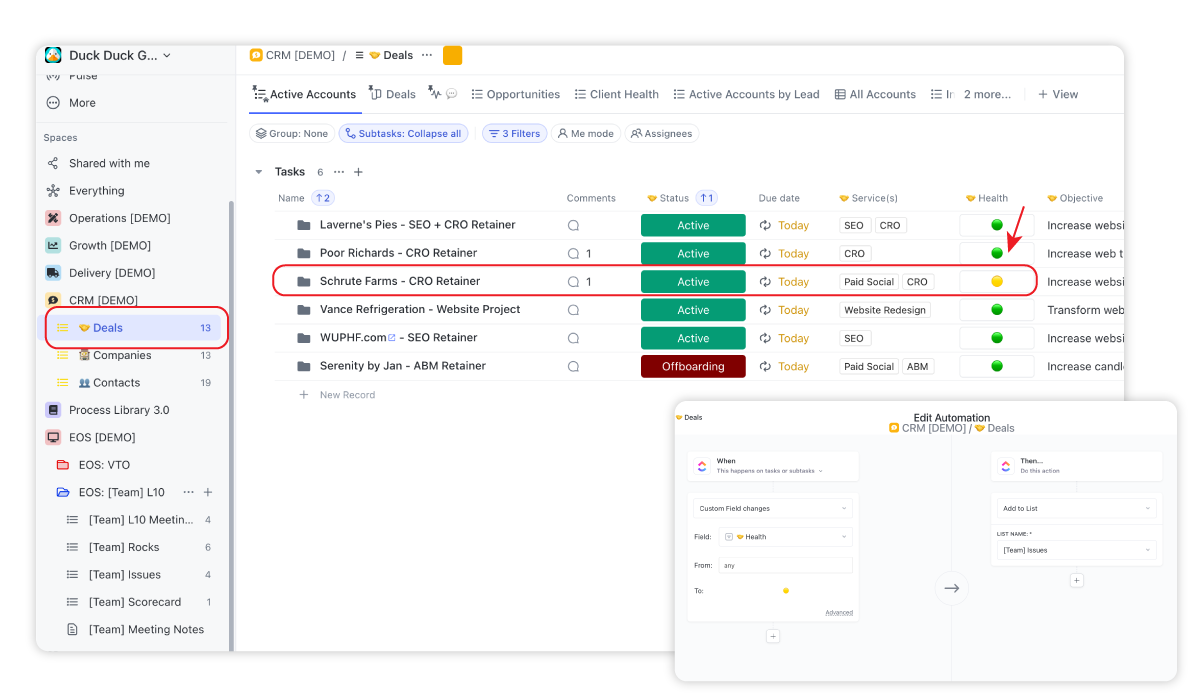
The "task" will not be moved to the issues list, but it will be added to the issues list and live in both lists (see screenshot below).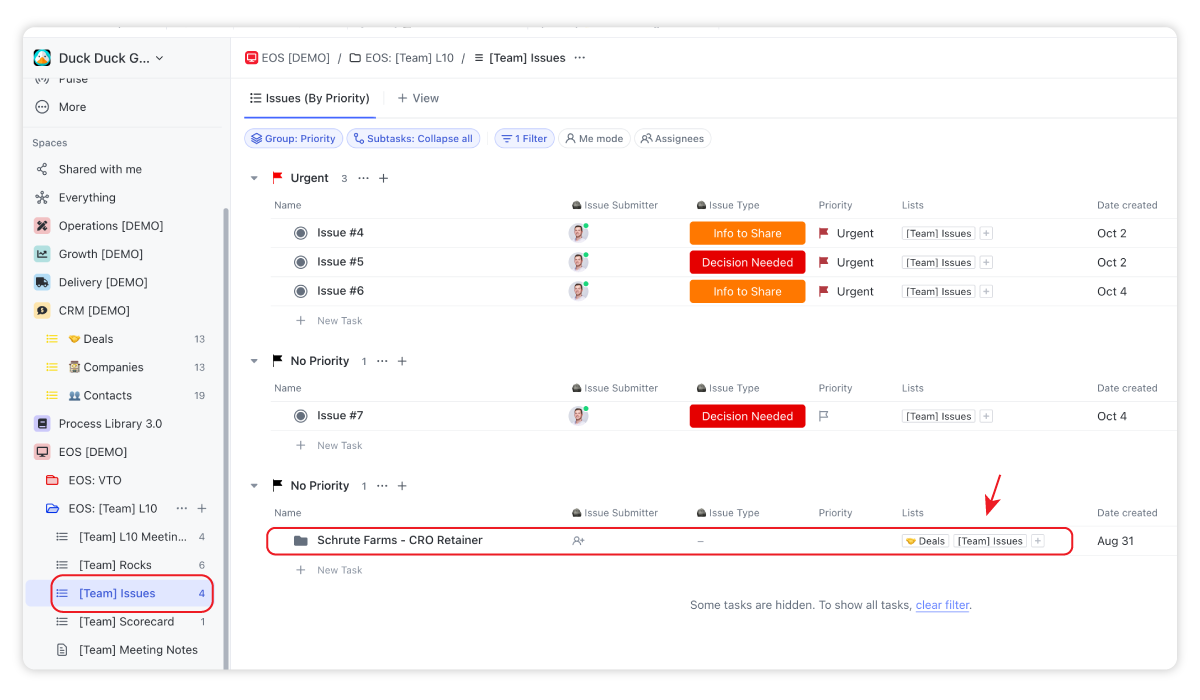
Need a trusted ClickUp expert to configure this process for your team? Book a call with one of our experts.
Step 5: Close the Meeting
Lastly, you'll want to close the meeting and assign all action items with due dates and time estimates.
Once your meeting is over, make sure you have everything documented, tasks are assigned out, and the team has rated your meeting on a scale of 1-10.
You can send a followup in Slack and then deploy a template for next week's meeting!
With your L10 meetings™ run in ClickUp, you stay accountable to the rhythms and everything becomes connected and actionable.
Run EOS® in ClickUp
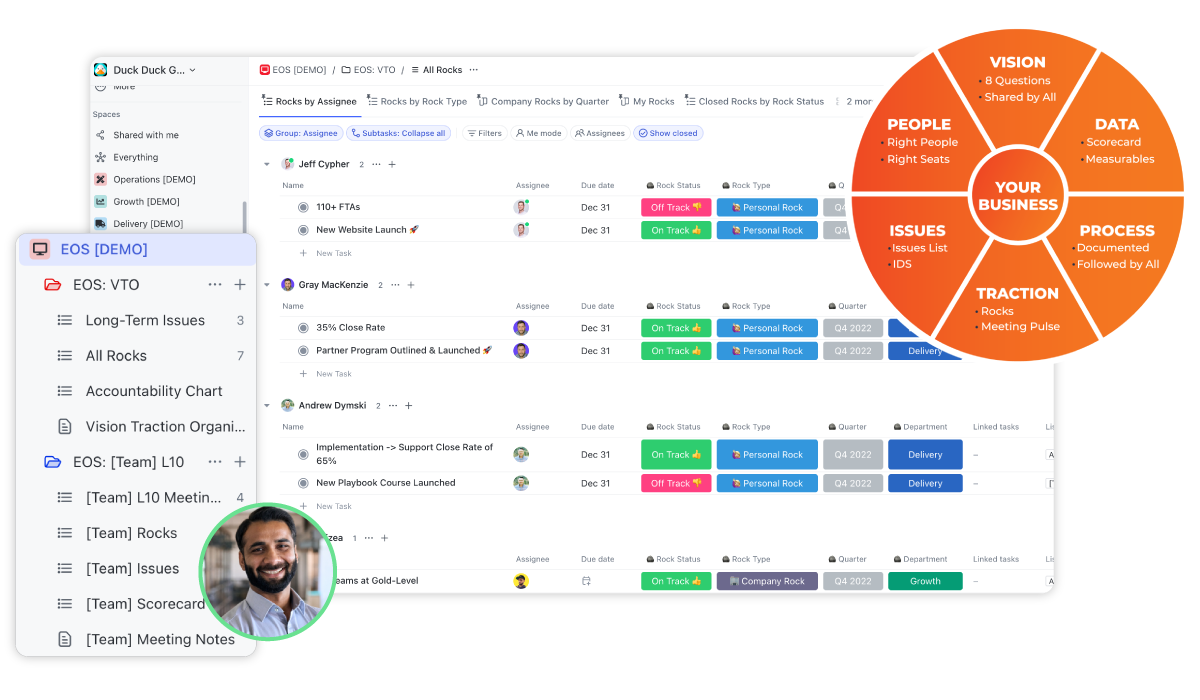
Get the full EOS® ClickUp template to start running EOS® in ClickUp today. Track your rocks, run L10 meetings™, and IDS™ directly in ClickUp.
Build a More Productive Team With Level 10 Meetings™
I wouldn't be writing this article if I didn't believe in this framework myself.
We've used Level 10 Meeting™ agendas even before we implemented EOS®. They've been a foundational component to our success.
Meetings are actionable, our team is much more productive, and we solve plenty of issues before they become fires.
If you're not sold on the idea, I suggest you ask your team to start rating your current meetings. If you receive a lot of ratings in the 4-7 range, it may be time to change it up.
And if you'd like guidance on how to run more productive meetings in ClickUp, book a call with my team.
We've helped close to 3,000 agencies build more productive, profitable, and healthy teams and we'd love to do the same for you.
Cancel chaos.
Create clarity.
You can build a happier, more productive, more profitable team with ClickUp. We'll show you how.
